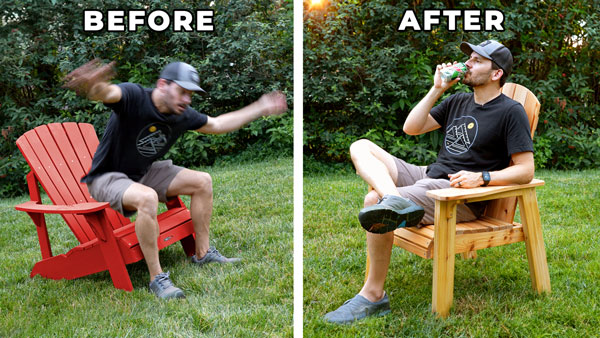
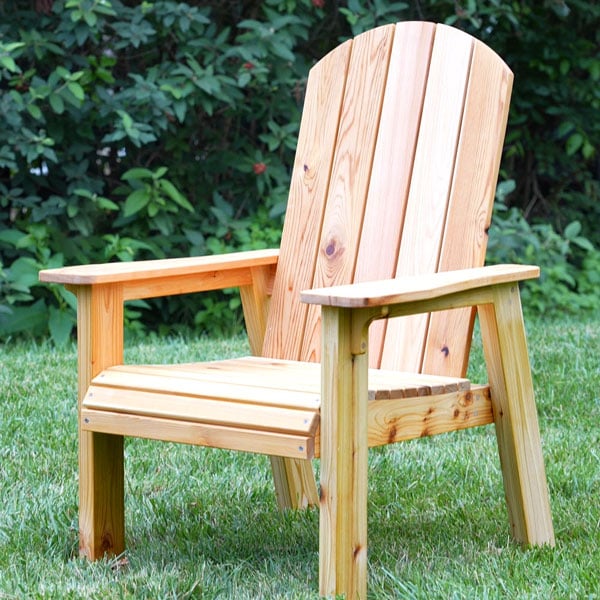
This is a modern take on the age old Adirondack chair. With a raised seating height it’s much
easier to get in and out of, but still a comfy place to take a break. Build a pair and enjoy the
summer evenings.
Before we get started, make sure to follow me on YouTube, Facebook, and Instagram to keep up with all my latest builds!
If you want more home DIY projects, check out some of my favorites. These basic and straightforward directions will make these projects easy.
DIY Closet Organizer with Shelves and Drawers
How to Build a Sturdy Workbench Using Cheap Wood
Tool Storage Wall Cabinet
Here is what you’ll need for the project:
Tools Used
- Miter Saw
- Bandsaw or jigsaw
- Dowel jig, Kreg 720, or Domino
- Palm Router
- Impact Driver
- Sander
- ISOtunes Bluetooth Earbuds
Materials/Supplies
- (4) 8’ 1×6 cedar boards
- (1) 8’ 2×6 cedar boards
- (2) 8’ 2×4 cedar boards
- 3/8” cedar dowel
- Outdoor rated wood glue
- Marine grade varnish
- 1-1/4” outdoor screws
- 2-1/2” outdoor screws
- CA glue
Affiliate links are used on this page. See my disclosure page for info on affiliate programs.

Step 1: Choose and Prep Your Lumber
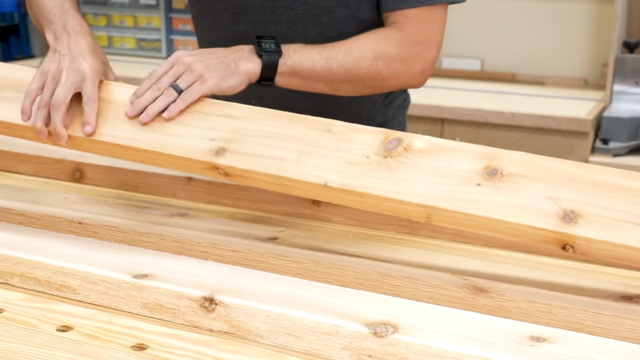
I built this chair using cedar for its outdoor durability. After selecting the best boards (knots and all), I ran them through the planer to better see the grain and prep them for cutting.
What Type of Wood Should I Use to Build an Adirondack Chair?
For outdoor furniture like an Adirondack chair, you’ll want to use wood that can handle the elements. The top choices are Cedar, Cypress, or Pressure-Treated Pine.
I used Cedar for my build because it’s naturally rot-resistant, lightweight, and easy to work with. It looks great with a clear finish or left to weather naturally.
Cypress is another solid option with good outdoor durability, and Pressure-Treated Pine is the most budget-friendly, though heavier and rougher to work with.
Step 2: Build the Leg Assemblies
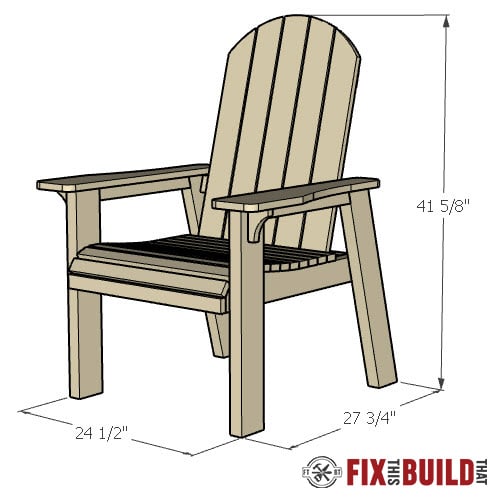
The front legs of the chair are straight, but I designed the back legs with a more upright 15° angle. This gives the chair a more comfortable seat height and makes it way easier to get in and out of compared to traditional Adirondack chairs.
Cutting Legs to Length
Next I used a simple trick to get the correct leg lengths. After cutting the straight leg to length, I sandwiched a 15 degree cutoff between the ends of both boards. Then I was able to use the first board length as a guide to mark the correct length on the angled leg. Finally I cut the top stretcher as well.
Adding Joinery
After dry-fitting everything to make sure it came together cleanly, I moved on to joinery. I used dominoes for my build, but pocket holes or dowels would work just fine too. If you want to see the full process in action, check out the YouTube video. And for step-by-step instructions with 3D diagrams, take a look at the project plans—they walk you through every detail of the build.
Step 3: Create a Comfortable Seat Base
The Modern DIY Adirondack Chair has to be comfortable, and a contoured seat makes all the difference. So I designed a curved seat base with that in mind.
Testing the Seat Base
I started by cutting a template on my CNC to test out the curve on the seat base. Then I used that template to cut the shape out of (2) 2x4s. Evidently I have trust issues because I didn’t want to drill into my leg assemblies to test out the seat base. Instead I made a very rough replica of my leg assemblies and attached the test seat bases to them. Finally I taped the chair slats onto the seat base and tried it out.
Cutting the Seat Base
The test run went great, so I was ready to make the real version. I used double-sided tape to attach the seat base template to the cedar board I planned to cut. Then I was able to use my drill stand to cut away most of the excess material. Finally I used a pattern bit on my handheld router to get the board to the exact size of the template.
You’ll get great results when you build your own because the DIY Adirondack Chair plans come with my template. Just print it out, tape it together and you’ll be ready to make your own seat base.
Step 4: Prep the Seat Slats
Drilling Holes in the Seat Slats
Next I cut out all of the slats. Then I drilled countersink holes near the ends of the slats. To make perfect, repeatable holes I attached a countersink bit to my drill press and went to town. If you don’t have a drill press you can use a drill instead. Just make each hole as straight as you can, and invest in a countersink bit.
Next I applied finish to each slat before attaching them to the seat base because it would be so much easier and faster that way. But first I . I cut all the slats, pre-drilled countersunk holes using a simple drill press jig, and sealed them with a marine-grade finish before assembly.
Leave a small gap between slats for water drainage and easier finishing.
Step 5: Assemble the Seat
I used spacers to maintain consistent gaps between slats and attached them to the base, working from front to back. I added internal stretchers to keep everything square and solid.
Step 6: Shape and Add the Armrests
Wide armrests = more comfort and space for drinks and snacks. I used a template to cut matching shapes and added small corbels underneath for extra support.
Step 7: Build and Attach the Chair Back
I cut five matching back slats with a gentle arch, then attached them using cleats across the bottom and top. The back angle matches the base at 15° for a relaxed but not too reclined feel.
Step 8: Final Assembly and Finishing Touches
Once everything was assembled, I gave it a final sanding, added any last countersink plugs, and did a final coat of finish.
Ready to Build Your Own?
You can grab the full step-by-step printable plan below! It includes detailed cut diagrams, material lists, and measurements to make your build a success.
👉 [Get the Adirondack Chair Plan Here]
Did you know that I sell bundle plans for Home DIY Projects? Right now, you can BUY 2 PLANS-GET 1 FREE! Click HERE!
These bundle plans give you detailed instructions for all of your home projects! There is no better time for home builds than NOW!
Have you always wanted to have better control over your garden? This DIY Raised Garden Bed Backyard Makeover will make you want to get to work! Click HERE for more information.
I’ve got great tips and tricks to share with you. Here is a post on 6 Ways to Plug or Fill Pocket Holes. Click HERE to learn more.
Warm weather is just around the corner and we have plans to help with outdoor entertaining. Modern Outdoor Sofa and Chair Plans. Click HERE!